How to do Bhastrika Pranayama in 4 steps. Bhastrika breathing benefits, contraindications, precautions, side-effects, traditional and kundalini yoga techniques
In Sanskrit, Bhastra are the bellows used to pump up the fire. Bhastrika Pranayama is indeed the bellow breathing exercise, called so because the movement of the diaphragm mimics a pair of bellows and fans an internal fire, creating physical, pranic, and psychic heat.
In this article, we are going to give step-by-step instructions on how to do Bhastika Pranayama in four different traditional techniques as they are provided by Swami Satyananda. Contraindications, side effects, and benefits of bhastrika breathing are also listed in detail and with scientific backup.
Check Also:
> Nadi Shuddhi Kriya – A Kundalini Pranayama Practice
What Asana (Posture) shall I use to practice Bhastrika?
Let’s start from the basics. The rapid breathing performed in bhastrika pranayama, requires a steady asana, such as padmasana (lotus pose), siddhasana or siddha yoni asana (accomplished pose), are the best as they lock the body into a stable position and allow the freedom of abdominal movement. If those postures are too advanced, other sitting or even standing positions can freely be used, especially for technique one and two, those without bandhas.
Preparations for Bhastrika Pranayama
Before practicing any pranayama, including bhastrika, both nostrils need to be cleaned and flowing freely, neti kriya and neti pot should be used before a session of bhastrika pranayama. Another method to open up the nasal passages is performing full inversions for 3 to 5 minutes, sirsasana (headstand) is the best pose for this.
Prerequisites
nostrils shall be balanced (swara yoga exercise can be performed to achieve this). The student must be familiar with diaphragmatic (abdominal) breathing. Bandhas and Antar and Bahir Kumbhaka (external and internal breath retention) shall be well set in your practice before attempting the advanced stages of bhastrika breathing practice.
Control of the nostrils is through nasagra mudra, with the right-hand thumb controlling the right nostril and the right-hand ring finger controlling the left.
Bhastrika from beginner to advanced
according to Bihar School of Yoga, Bhastrika pranayama is graded over four techniques.
Techniques 1 and 2 are for beginners, as they establish the basic method of practice. Technique 3 is intermediate, as it increases the number of breaths in each round, introduces Jalandhar bandha and Moola bandha, and requires internal retention (antar kumbhaka).
Technique number 4 is the advanced level. Here all bandhas are performed together (maha bandha) and external breath retention (suspension, bahir kumbhaka), the number of repetitions is also increased dramatically.
Practicing bhastrika pranayama without the guidance of a teacher is certainly possible, but you as a practitioner should be able to understand how to proceed in a sensitive manner, slowly and without strain, being aware of your level of experience.
Fast or slow? The correct speed for bhastrika pranayama
bhastrika may be p[practiced at three degrees of intensity: slow, medium, and fast, depending on the capacity of the practitioner.
- Slow or mild bhastrika is practiced to approximately one breath every two seconds, with no undue force on inhalation or exhalation. It’s like amplified normal breathing. Slow bhastrika should be practiced by beginners and those practising for therapeutic reasons, although it’s beneficial at all stages.
- Medium bhastrika increases the speed of respiration to approximately one breath per second.
- Fast Bhastrika’s speed is around two breaths x second.
How To do Bhastrika Pranayama
A Step-by-Step Practice
Basthrika Technique 1: Preparatory practice (no side-effects)
Assume a comfortable meditation posture, placing your hands on your knees in either chin or jnana mudra. Ensure your head and spine are straight, close your eyes, and relax your entire body.
Inhale deeply and exhale forcefully through your nose. Immediately follow with a forceful inhalation, fully expanding your abdominal muscles, and a firm contraction of the abdominal muscles during exhalation. Avoid straining.
During inhalation, the diaphragm descends and the abdomen moves outward, while during exhalation, the diaphragm moves upward and the abdomen moves inward. Slightly exaggerate these movements.
Repeat this process for ten breaths.
Take a deep breath in and exhale slowly. This completes one round. Repeat up to five rounds in total.
Note that as you become familiar with this breathing style, you can gradually increase the speed while maintaining a rhythmic breath. Ensure that the force of inhalation and exhalation remains balanced.
Technique 2: Alternate nostrils bhastrika
Assume a comfortable meditation posture, such as padmasana or siddha/siddha yoni asana. Maintain a straight head and spine. Close your eyes and relax your entire body.
Left side: Lift your right hand and form nasagra mudra. Use your thumb to close the right nostril. Take deep breaths through the left nostril without straining, repeating this process ten times. You should hear a snuffing sound in the nose, but there should be no sound coming from the throat or chest.
Ensure that the abdomen expands and contracts in a rhythmic manner with each breath. The pumping action should be solely carried out by the abdomen while keeping the chest, shoulders, and face relaxed.
After completing ten breaths, take a deep inhalation and exhale through the left nostril.
Right side: Close the left nostril and repeat the same process through the right nostril. Then, place your raised hand back on your knee and repeat the process through both nostrils.
One complete round consists of ten breaths through the left nostril, followed by the right nostril, and then both nostrils as described above. Practice up to five rounds.
For beginners, it is recommended to take several relaxed breaths between rounds to avoid strain. Breathing can be practiced at three different rates: slow, medium, and fast, depending on individual capacity.
Slow bhastrika involves maintaining a pace of approximately one breath every two seconds, without exerting excessive force during inhalation or exhalation. It resembles amplified normal breathing and is particularly beneficial for beginners but can be practiced at any stage.
Medium breathing increases the speed of respiration to approximately one breath per second, while fast breathing entails a pace of around two breaths per second. Both medium and fast breathing rates are suitable for intermediate and advanced practitioners.
As the abdominal muscles strengthen through regular practice, it is possible to gradually increase the number of respirations per cycle by five each month until reaching a count of 50 respirations.
During the practice, maintain awareness of the breathing process and the physical movement of the abdomen. Additionally, focus on the Manipura chakra for spiritual awareness.
Technique 3: Incorporating Inner Retention (Antar Kumbhaka)
To be practiced Once Technique 2 has been mastered
Left Side: Close the right nostril using the thumb. Breathe forcefully in and out through the left nostril, while ensuring rhythmic expansion and contraction of the abdomen. After completing the forceful breaths, take a deep inhalation, expanding both the abdomen and chest. Close both nostrils and hold the breath for a few seconds. Exhale through the left nostril.
Right Nostril: Close the left nostril and repeat the same process through the right nostril.
Both Nostrils: After completing the forceful breaths through both nostrils, inhale slowly and deeply. Close both nostrils and hold the breath for a few seconds. Exhale slowly through both nostrils.
This completes one round. Practice up to five rounds.
Practice note: If the exhalation feels blocked after retention, a slight inhalation before exhaling can release the locked condition of the glottis and reactivate the respiratory muscles.
Advanced practice: Incorporating Bandhas Perfect Jalandhara Bandha and Moola Bandha as separate practices before applying them in this technique. After mastering Antar Kumbhaka, Jalandhara Bandha and Moola Bandha can be practiced during internal breath retention.
At the end of each round, take a deep inhalation and hold the breath inside. Practice Jalandhara Bandha, followed by Moola Bandha. After the desired duration of retention, release Moola Bandha, then Jalandhara Bandha, and finally exhale.
Duration: Practice up to five rounds. Gradually increase the duration of inner retention, aiming for up to 30 seconds. Avoid straining.
Technique 4: Incorporating External Retention (Bahir Kumbhaka)
Once Technique 3 has been mastered, you may begin practicing external retention.
After achieving proficiency in the practice of external retention, you can advance to incorporating Maha Bandha. It is recommended to first perfect Maha Bandha as an individual practice.
At the end of each round, take a deep inhalation through both nostrils and then exhale completely. Hold the breath outside the body for a few seconds. Practice Maha Bandha. Release Maha Bandha and inhale.
Duration: Practice up to five rounds. Gradually increase the duration of external retention, aiming for up to 30 seconds. Avoid straining.
Precautions and side-effects of Bhastrika Pranayama:
Bhastrika is a dynamic practice that requires a significant expenditure of physical energy. Beginners should take a short rest after each round. Avoid forceful respiration, facial contortions, and excessive body shaking. Feeling lightheaded, excessive perspiration, or vomiting indicates incorrect practice and should be avoided.
If any of these symptoms are experienced, it is recommended to seek guidance from a knowledgeable instructor.
This practice has a cleansing effect on the blood. However, if the stages are rushed, it can lead to a sudden expulsion of impurities from the body, which may worsen conditions associated with detoxification. Therefore, it is advised to approach this practice gradually and with mindfulness.
Seek the guidance of a competent teacher before practicing pranayama with bandhas.

Contraindications to Bhastrika Breathing:
Technique 1 is a mild pranayama and can be practiced by anyone without any contraindications.
Technique 2: Individuals with high blood pressure, heart disease, hernia, gastric ulcer, stroke, epilepsy, retinal problems, glaucoma, or vertigo should refrain from practicing Bhastrika. The elderly, those with lung diseases such as asthma and chronic bronchitis, individuals recovering from tuberculosis, or those in the first trimester of pregnancy are recommended to practice only under the guidance of a qualified instructor.
Technique 3: On top of the contraindications for Bhastrika in Technique 2 also the contraindications for Jalandhara and Moola Bandhas should be considered.
Technique 4: Refer to the contraindications for Maha Bandha as well as all the previous bhastrika contraindications and dangers.
Benefits of Bhastrika Pranayama:
Several scientific studies have deeply analyzed the effects of bhastrika pranayama both for physical and mental health.
- Bhastrika has been proven to reduce anxiety and increase positive affect, changes associated with the activity and connectivity of a brain network involved in emotion processing, particularly the amygdala, anterior cingulate, anterior insula, and the prefrontal cortex.
- Resting-state fMRI revealed improved awareness and attention.
- Bhastrika reduces the level of carbon dioxide in the blood.
- It assists in relieving throat inflammation and the clearance of accumulated phlegm.
- It balances and strengthens the nervous system, inducing a state of peace, tranquility, and focused attention in preparation for meditation.
- It is particularly beneficial for women during labor after adequate preparation over a few months.
- Due to the rapid exchange of air in the lungs, there is an increased exchange of oxygen and carbon dioxide in the bloodstream. This stimulates the metabolic rate, generating heat, and flushing out waste and toxins.
- The rapid and rhythmic movement of the diaphragm also massages and stimulates the internal organs, promoting the toning of the digestive system.
- On an ayurvedic note, bhastrika aids in the elimination of toxins and helps balance the doshas or humors: kapha (phlegm), pitta (bile), and vata (wind).
- Technique 4: This practice activates the brain, enhancing mental clarity, thought, and concentration. It boosts vitality and reduces stress and anxiety by harmonizing energy and pranas. It clears pranic blockages, allowing the flow of Sushumna Nadi, leading to deep states of meditation and spiritual awakening. It is believed to burn through karmic imprints.

Bhastrika in kundalini/kriya yoga
In Kundalini Yoga, the practice of Bhastrika may be performed in different postures and synced with specific movements of the arms, the spine, or literally any part of the body (check my kashtha takshanasana article).
One common variation involves the following steps:
- Sit in a comfortable meditation posture or stand in a strong wide legged tadasana, with the spine straight and the hands resting on the knees or by your side.
- Begin Bhastrika Pranayama by taking a deep inhalation through both nostrils, filling the lungs with air. Simultaneously raise both arms straight out in front of you, palms facing forward.
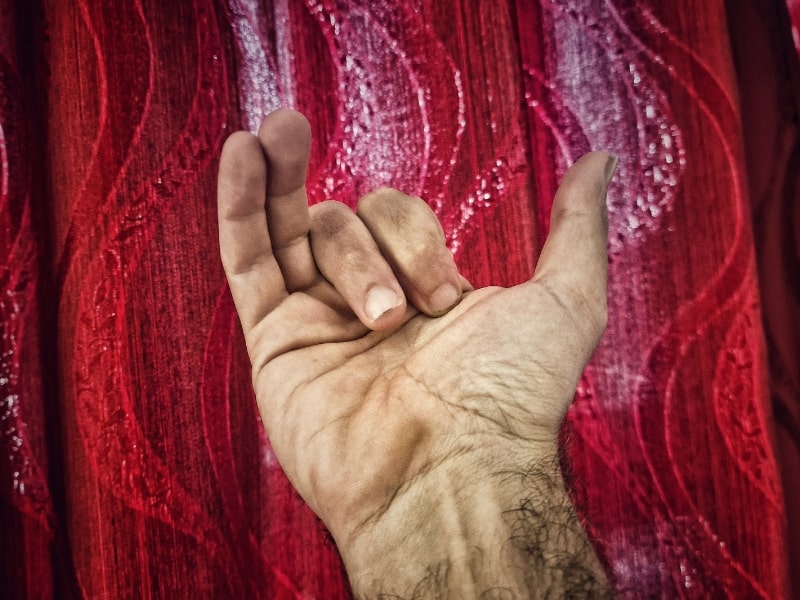
- As you exhale forcefully through the nose, lower the arms down with elbows bent and close to the external side of your ribs. Hands close in a fist but the thumb is left sticking out towards your midline.
- Continue this rhythmic movement of the arms, raising them on the inhale and lowering them on the exhale, while maintaining the forceful breath through the nose or mouth as instructed.
- Throughout the practice, keep your focus on the breath and the movement of the arms, synchronizing them.
In this variation, the thumbs are kept out (extended) as part of the hand posture. This specific hand position is believed to enhance energy flow and balance during the practice.
Kundalini Yoga practices, including Bhastrika, are often taught within the context of a comprehensive Kundalini Kriya or set of exercises. There are as many ways to practice bhastrika as you can think of.
The specific instructions and variations may vary depending on the Kundalini Yoga tradition and the creativity and wisdom of the Kundalini Yoga teacher. Check for example my bhastrika kriya video down here.
FAQs about Bhastrika Pranayama
Is bhastrika pranayama the breath of fire?
There’s a lot of confusion when it comes to the English term “breath of fire”, sometimes that’s said to be kapalabhati, sometimes bhastrika, and Yogi Bhajan has even invented a new type of breath in between the two and called it Agni Pran, literally “breath of fire”. As explained in the introduction, bhastrika could be considered a breath of fire as it ignites internal fires, but it’s never referenced as such in traditional texts. Kapalabhati though, is certainly not breath of fire.
is bhastrika dangerous?
Bhastrika Pranayama (bellows breath) is generally considered safe when practiced correctly and under proper guidance. However as mentioned above, it has certain risks like any pranayama technique. It is important to approach it with caution and be mindful of the contraindications for people with high blood pressure, heart disease, hernia, gastric ulcer, stroke, epilepsy, retinal problems, glaucoma, vertigo, lung diseases like asthma or chronic bronchitis, or in the first trimester of pregnancy.
Proper Technique is paramount, including maintaining a comfortable pace of breathing, avoiding excessive strain, and correct coordination between the breathing and the movement of the abdomen.
Always listen to Your Body: pay attention to how your body responds during the practice. If you experience dizziness, shortness of breath, excessive discomfort, or any other unusual symptoms, stop the practice and consult a healthcare professional.